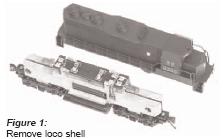
1. Carefully remove the locomotive’s shell from the frame. Notice the orientation of the shell for reinstallation.
2. Carefully remove the motor springs with tweezers. Store these springs in a safe place for later re-use.
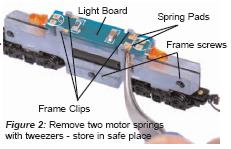
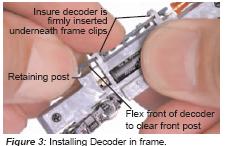
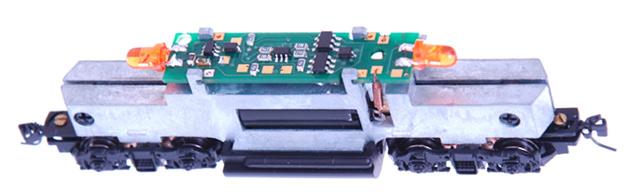
3. Slide the factory light board forward to release it from under the clips on the locomotive frame. Be careful not to distort the frame clips as you slide and lift the light board off the frame. 4. Take the DZ123M0 decoder (noting the correct orientation of the frame pads) and slide underneath frame clips as indicated in the Figure 3. You will need to gently flex the front of the decoder in order to clear the GP-35’s retaining post (partially shown).
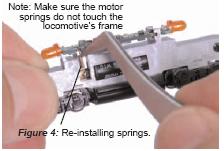
5. As shown in Figure 4 reinstall the motor springs, taking care to insure the springs do not touch the loco frame. Finally reinstall the locomotive shell.
Completed Installation:
6. Place the locomotive on the track, select address 03 on your throttle and apply power. If the motor does not respond but you can control the lights, check the installation for motor spring short circuits. 7. Digitrax decoders are set up with configuration variable (CV) default values so you can run your locomotive right away using address 03. See the referred articles for complete instructions on setting up the CVs for customizing your locomotive’s performance characteristics.