1. Carefully remove the locomotive's shell from the frame (Figure 1, below).
Notice the orientation of the shell to the frame so that you can reinstall correctly.
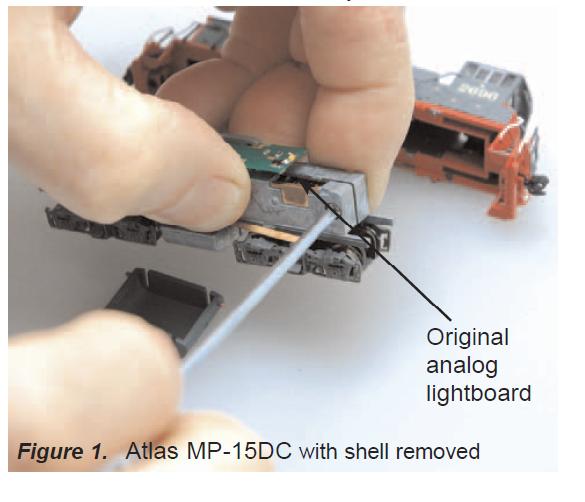
2. To remove the Atlas MP-15DC standard lightboard you will need to loosen the frame screws as shown in figure #1.
After the frame halves are loose enough, the standard light board can easily be removed by moving the light board to one side and tilting the lightboard out.
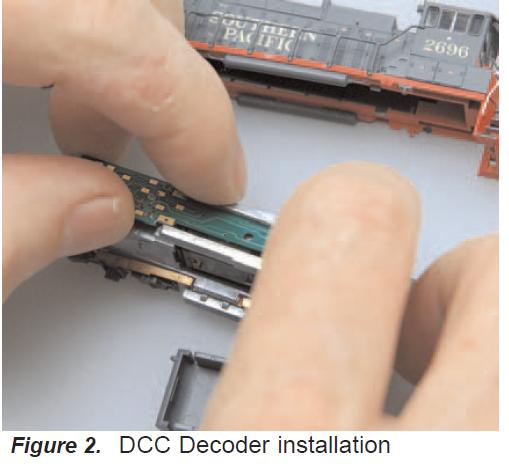
3. Installation of the DN163A3 decoder is the reverse of the removal sequence.
With the frames halves still loosened, slide the DCC decoder into position as shown. (Figure 2, below)
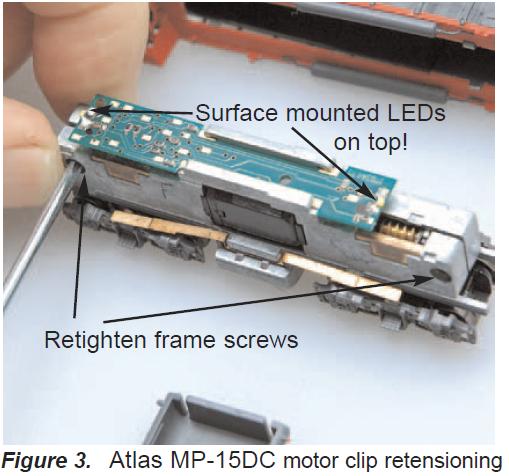
4. Confirm the DN163A3 decoder is oriented as shown. (Figure 3, below)
The decoder should be placed component side down, with the surface mounted LEDs on top of the PCB.
Finally retighten the frame screws to secure the decoder.
If done correctly, the decoder should fit snugly.
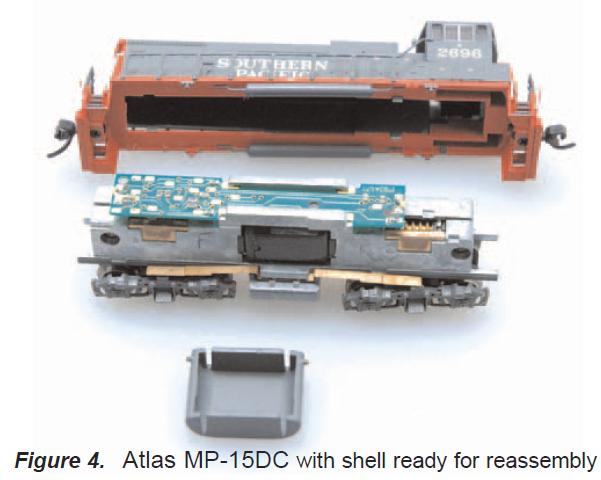
5. Re-install the MP-15DC shell and fuel tank and you're done! ( Figure 4, below)
6. You are now ready to run your locomotive.
The DN163A3 is factory programmed to address 03 and you can easily customize the address and other features.
Please see related articles.