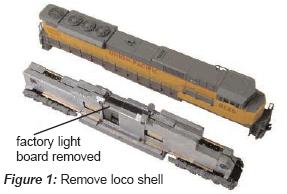
1. Carefully remove the locomotive’s shell from the frame.
Notice the orientation of the light board, so that you can install the new decoder in the same orientation.
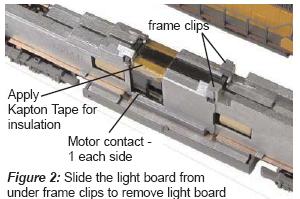
2. Carefully remove the factory light board by sliding it toward the back of the locomotive and out from under the frame clips.
Then gently lift the board out of the frame. Be careful not to bend the motor contacts.
Apply a small piece of Kapton tape to saddle area of the frame above motor.
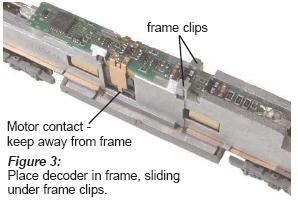
3. Install the DN163K2 decoder by angeling it slightly as you insert the front corners into the forward frame clips.
Press the decoder motor clips down over the motor contacts.
Check to make sure the clips are not in contact with the frame and slide the decoder board forward and press the board down into the frame.
4. Replace the locomotive shell.
Digitrax decoders are set up with configuration variable (CV) default values so you can run your locomotive right away using address 03.
Installation Notes:
1. Do not exceed the decoder’s 500mA total function output rating.
2. To use a function output with an inductive (coil) type load, see the Digitrax Decoder Manual for more information to avoid damage to the decoder.
3. See the Digitrax Decoder Manual for full details of wiring 12-16V lamps, 1.5V lamps, and LEDs.
Lamps that draw more than 80 mA when running require a 22 ohm 1/4 watt resistor in series with the directional light function lead to protect the decoder.