The DH165Q1 fits many Atlas, Intermountain, Life-Like & Other factory sound equipped HO locomotives.
Installation Instructions -
Intermountain F7 example:
Removing Locomotive Shell and Disconnecting Lightboard
1. Carefully remove the front coupler and then the locomotive's shell from the frame. Note the orientation for proper reinstallation.
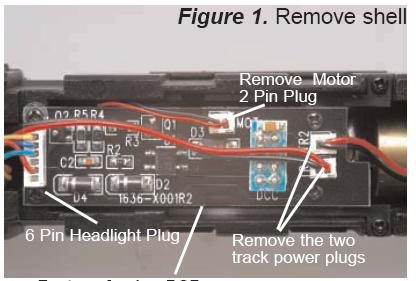
2. Unplug and mark the two track power pickup 2-pin plugs, the motor 2-pin plug and the 6-pin headlight plug
(Figure 1)
Observe and carefully note the original wire locations!
One of the track power plugs and the 2 pin motor plug can be inadvertently swapped when hooking up the new decoder PCB.
3. Unscrew the 4 small black screws retaining the old Analog PCB or sound decoder in the frame.
Lightboard Removal and New Decoder Board Installation
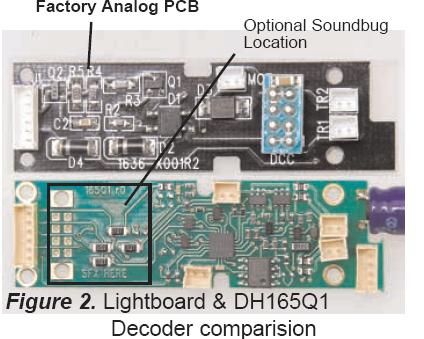
4. Physically remove the locomotive’s Analog PCB.
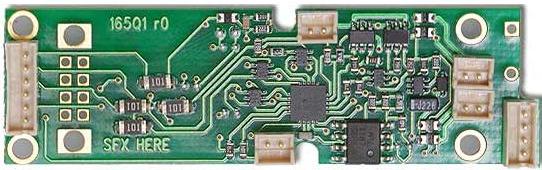
5. Install the DH165Q1 Decoder in place of the original lightboard.
Secure the decoder with the four screws.
Attach the two track power pickup 2-pin plugs, the motor 2-pin plug and the 6-pin headlight plug
(Figure 3).
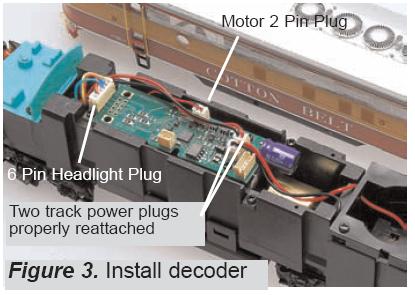
6. Replace the locomotive shell.
7. Digitrax decoders are set up with configuration variable (CV) factory settings so you can run your locomotive using address 03.
This installation will allow the loco to run short hood forward.
To run this loco long hood forward with lights coming on in both directions, change the Normal Direction of Travel CV29=07 and then remap F0R CV34=01 to make the headlight come on when the locomotive travels in reverse.