Setting up your new Zephyr:
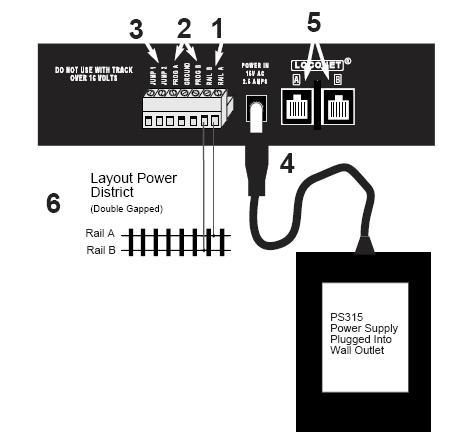
- Unpack the DCS-50 command station and the PS-315 power supply. On the back of the DCS-50,locate the gray screw terminal strip.On this strip, locate the two terminals labeled “RAIL A “and “RAIL B”.Attach these terminals to your track wires.It does not matter which is which.
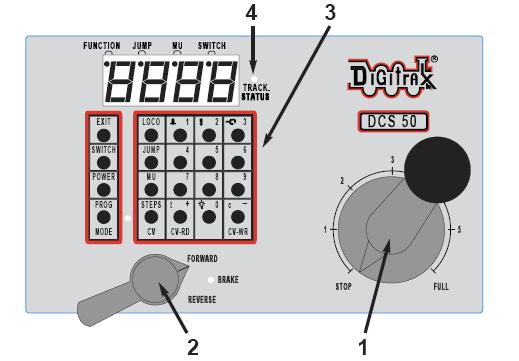
- Before proceeding to the next step,make sure the throttle knob [1] is turned all the way to “stop” and the direction/brake lever [2] is set to”brake”. [See photo blelow].
- Now, find the plug on the back of the DCS-50 marked “POWER IN, 15 VAC, 2.5 AMPS”. This is where you plug in the barrel connector from the PS-315 power supply. Do so now. Next,plug the PS-315 into a convenient 110 VAC wall outlet.
- Going back to the front panel on the DCS-50,locate the button marked “POWER”. It is on the left hand column of buttons. When you push it,the orange “TRACK STATUS” light [4] will come on.

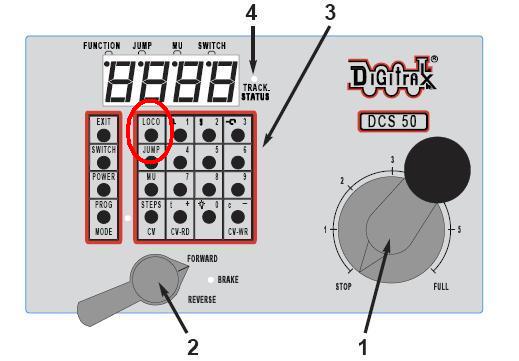
- Now, look at thbuttons on the front panel. Locate the one labeled “LOCO”. Press this button ONCE, enter the 2 or 4 digit address e main group of of your loco on the keypad [3], and press “LOCO” once again. Now, you have selected a loco to run!
- To run the locomotive, move the direction/brake switch [2] to either ‘FORWARD” or “REVERSE”, depending on which way you want the loco to move, and slowly turn the throttle [1] clockwise until the locomotive starts to move. To stop the loco, either turn the throttle back to “STOP”, or shift the direction/brake switch to “BRAKE”.
Now you're running with DCC! For more advanced features, please refer to the rest of this section of the Tech Support Depot.