1. Carefully remove the locomotive’s shell from the frame.
Notice the orientation of the shell to the frame so that you can reinstall correctly.
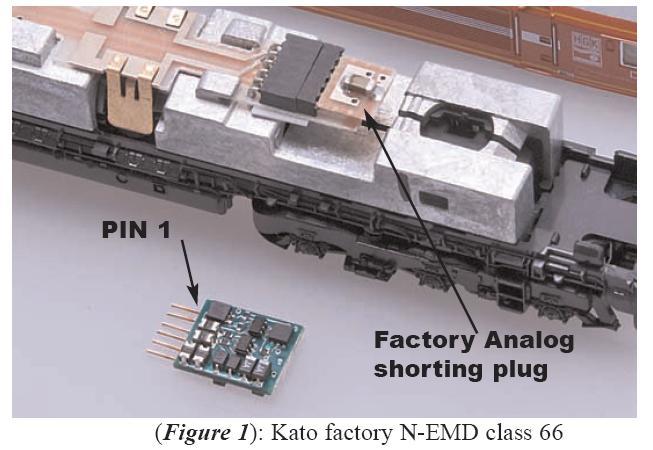
2. Remove the 6 pin analog shorting plug and in its place insert the DZ125IN/DZ126IN decoder with the correct pin-1 orientation. (There also is a small numeral "1" on the bottom of the DZ125IN near pin-1.) The DZ125IN has 6 pins that insert directly into the 6 pin socket (NEM 651 type) on the locomotive’s PCB.
The DZ125’s small size allows the decoder to be easily installed in a variety of European locomotives.
For the Kato EMD Class 66 example, the DZ125IN should be inserted in the socket as shown in Figure 2. 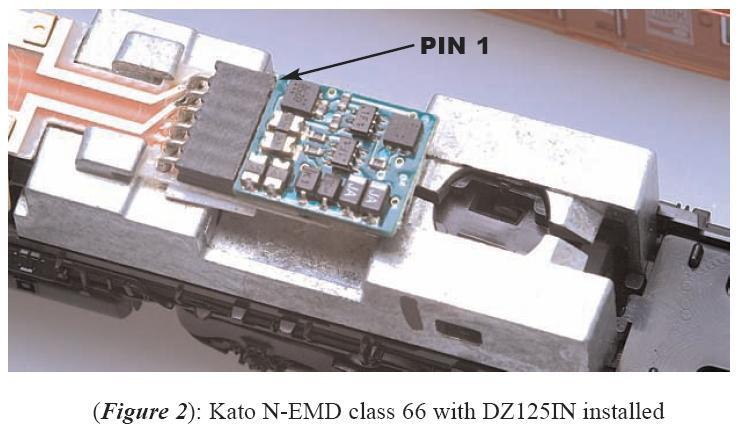 3. Test the locomotive on some track with a DCC system to verify motor and lights work in both directions.
4. Reinstall the locomotive’s shell , install is complete!