Application Note: Con-Cor HO-Scale Zephyr steps needed for the DZ125PS decoder installation
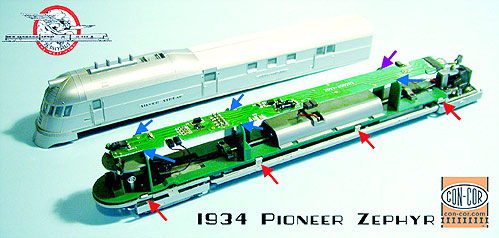
Step 1: Carefully remove the body from the frame.
There are four clips along each side of the body. (See red arrows)
We have found if you start at the rear of the body with a small flathead screwdriver and carefully pry the body outward to remove the back clip, you can move the screwdriver forward to release the others.
Once the body is completely removed, carefully lift the light board from its holders on the bulkheads. (See blue arrows)
Be very careful as the pins that hold the board in place are very fragile plastic and break easily!
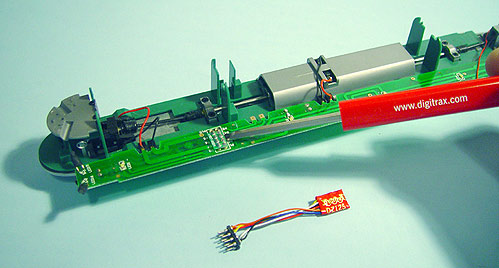
Step 2: After carefully laying the light board upside down, locate the 8-pin dummy plug and gently pry it out of the socket with a flathead screwdriver.
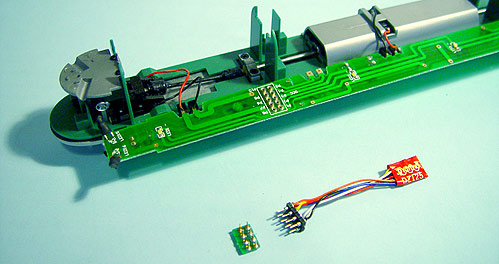
Step 3: Now that the dummy plug is removed, locate the pin where the orange motor lead wire is connected.
For this application, we have chosen to use a DZ125PS decoder because of its compatibility with our SFX004 sound decoder that will be installed later.
However, if you choose not to add sound, there is ample room in this model that you may also use any of the following Digitrax decoders: DH123P, DH123PS, DH163P, DH163PS, DN163PS, DZ123PS, DZ143PS.
The specific decoder you choose will depend upon the number of functions you want to control in your locomotive.
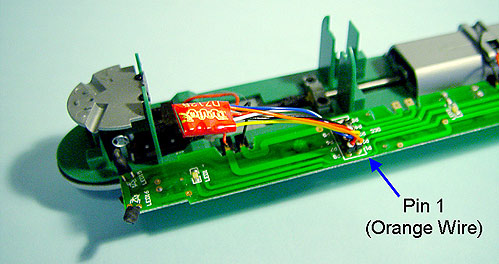
Step 4: Insert the NMRA medium plug wired to the DZ125PS into the socket on the Con-Cor light board, orienting the orange-wired pin 1 to the hole labeled P1.
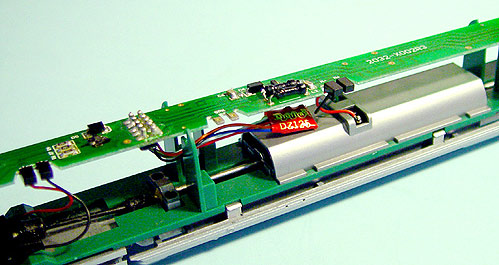
Step 5: Route the decoder wires through the bulkhead and place the decoder on top of the motor housing.
We recommend using a double-stick tape or a drop of silicone to hold the decoder in place and prevent noise from vibrating against the motor.
Then, carefully replace the light board back on the mounting pins and test run the locomotive.
Once you are satisfied that it operates correctly, reinstall the locomotive body.