Q: I'm wanting to know how to MU two locomotives together that are in a tail to tail configuration. I know that this can be easily done with a DT400 or DT402 throttle but not sure how to do it with the Zephyr.
A: Make sure all the locos in the consist are traveling in the same physical direction on the track (both going to the left or to the right). Remember that "reversing" takes place in the locomotive not on the track, so it is important that the engines be traveling in the same direction when they are MU'd. This is the same procedure for all Digitrax Command Stations.
To MU two addresses together with the DCS51 Zephyr Xtra or DCS50 Zephyr:
1. Choose the locomotives you want to Consist or MU together. Place them on the track. Select and run the first loco to determine which way it is headed. This will be the TOP address in the Consist. Then select the second loco and run it in the same physical direction as the first locomotive. The direction lever might have to changed so that both locos are running in the same direction. Do not change the direction lever once they are both running in the same direction.
2. Select the address of the first locomotive. This will be the TOP address in the Consist. To do this, press LOCO, enter the address & press LOCO again. Change the direction lever back to the way it was previously when you first selected this locomotive address.
3. Once you have the locomotives running in the same direction you are ready to MU them together.
For this example, we will use loco address 09 as the TOP address and we will add address 23 to the MU.
The display will show:
3. Press the MU key. The TOP address will remain in the display and the MU Indicator Dot will begin blinking indicating that you are preparing to add to the MU.
4. Use the numeric keypad to enter the loco address you want to add to the MU, in this case 23.
5. Press the t/+ key. If the MU you just set up is valid, the display will revert to the TOP address. You are now ready to run your MU. To run your MU, just turn the Throttle Knob to set the speed and use the Direction Control Lever to change directions. Use the numeric key pad to control the functions on the MU’ed locos.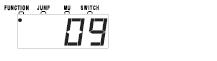
If you want to add more locos to the MU, repeat the procedure.To add locos to an MU you must add them to the TOP address. It’s a good idea to keep an MU set up sheet like the following to help you remember which locos are MUed together: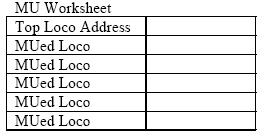
If your MU could not be set up you will see the following error message: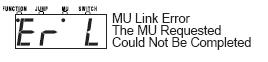
This happens when you try to link to an address that is already part of an MU or link an address that is under the control of another throttle. For example if you MU'ed address 14 to the top loco 23 and then tried to MU another address to 14 you would get this error. If you wanted to add another loco to the MU with 23 as the TOP address, the right way to do it is to add that loco to 23, not to another address in the MU.
-------------------------------------------------------------------------------------------------------------------------------------------
To remove a loco address from an MU consist:
1. On the DCS50, select the loco address that you want to remove from the MU by pressing the LOCO key, entering the address and pressing LOCO again. In this example, the TOP address is 09 with address 23 MU’ed to it. We will remove address 23 from the MU. The display shows address 23 with the Function and MU Indicator Dots lit.
2. Press the MU Key. The Function Indicator Dot will go off and the MU Indicator Dot will begin to blink indicating that you are MUing.
3. Press the c/- key to remove the loco address from the MU. The DCS50 will return to regular operation mode ready to run address 23 which you just removed from the MU.