DCS50 Zephyr - Quick Start Guide
1. Unpacking Your Zephyr
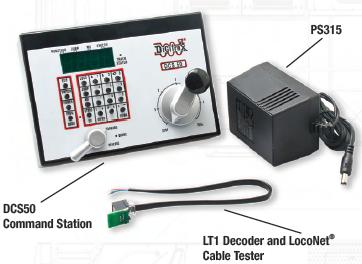
Unpack your box and locate the DCS50 Command Station and the PS315 power supply.
2. Before You Begin
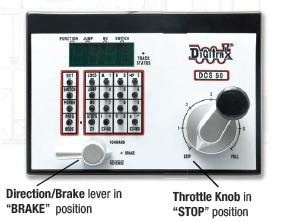
Before proceeding to the next step, make sure the Throttle Knob is turned all the way to “STOP” and the Direction/ Brake lever is set to “BRAKE”.
3. Connecting the Pieces Together
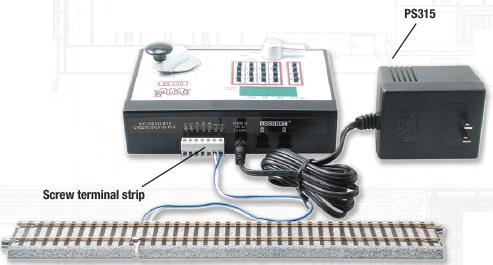
On the back of the DCS50, locate the gray screw terminal strip. On this strip, locate the two terminals labeled “RAIL A” and “RAIL B”. Attach your layout track wires to these terminals. It does not matter which is which.
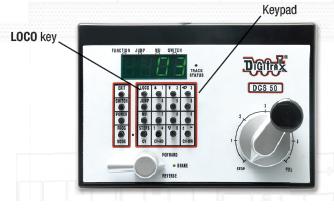
4. Turn on Track Power
On the front panel of the DCS50, locate the button marked “POWER”. It is on the left hand column of buttons. When you push it, the orange “TRACK STATUS” light will come on.

5. Select and Run Non-DCC Locomotives
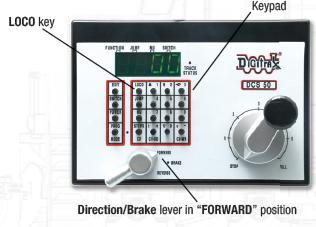
To select a non-DCC equipped (Analog) locomotive to run, look at the main group of buttons on the front panel. Locate the one labeled “LOCO”. Press this button ONCE, enter “00” and press “LOCO” once again. You have selected a locomotive to run!
To run the locomotive, place the locomotive on your layout, move the Direction/Brake lever to either "FORWARD” or “REVERSE”, depending on which way you want the locomotive to move, and slowly turn the Throttle clockwise until the locomotive starts to move. If your locomotive runs in the opposite direction of the throttle setting, turn the locomotive around. To stop the locomotive, either turn the Throttle back to “STOP”, or shift the Direction/Brake lever to “BRAKE”.
6. Select and Run DCC Locomotives
Most new decoders and DCC-equipped locomotives have their decoder address factory set to “03”. Other DCC-equipped locomotives may have had their address changed. To run a DCC-equipped loco, you must know its address. For detailed instructions on reading the address, see the Zephyr Manual, Section 16.2 Steps 1-4 or the related article (below).
For now, let’s assume you are using a brand-new, DCC-equipped loco that is set to address “03”. To select this locomotive, press the button labeled “LOCO” ONCE, enter “03” on the keypad, and press “LOCO” once again. You have selected a DCC loco!
To run the locomotive, move the Direction/Brake lever to either "FORWARD” or “REVERSE”, depending on which way you want the loco to move, and slowly turn the Throttle clockwise until the locomotive starts to move. To stop the loco, either turn the Throttle back to “STOP”, or shift the Direction/Brake lever to “BRAKE”.
7. What’s Next?
If you’ve been able to successfully run your DC or DCC equipped locomotive using these instructions, then we recommend you visit us at digitrax.com and read more about DCC principles, accessories and web links of interest.
The spiral-bound Zephyr Manual included in your starter set will provide you with a wealth of knowledge which will increase your enjoyment of DCC!