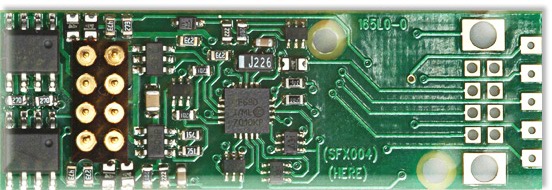
DH165L0 fits Life-Like GP7, SD60 and many other locos with Life-Like DCC medium plug arrangement.
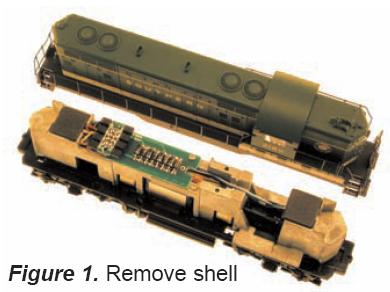
1. Remove locomotive shell, noting the orientation of the circuit board inside. (See Figure 1)
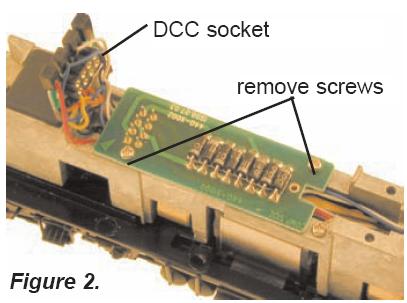
2. Unplug the the manufacturer’s DCC socket from the pins on the factory board.
Remove the two screws that hold the board in place.
(See Figure 2)
Lift out the factory board and save the two screws for future use.
3. Insert the locomotive’s DCC socket onto the pins on the Digitrax DH165L0 decoder board.
In this orientation, Pin 1 (the orange wire) is the lower left pin and Pin 8 (the red wires) is the lower right pin.
Many Life-Like locomotives with this medium plug have a small triangle which points to Pin 1.
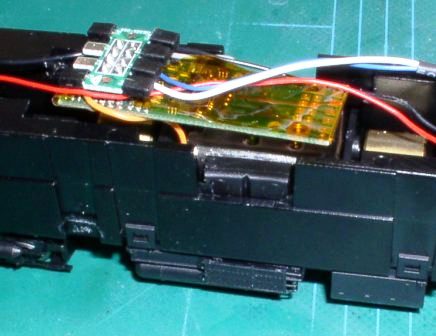
Be sure to place insulating tape between the bottom of the decoder and the metal locomotive frame.
The decoder is factory configured to work with the original locomotive 1.5V lamps/LEDs; please see the installation notes.
Installation Notes:
1. Do not exceed the decoder’s 500mA total function output rating.
2. The decoder F0F and F0R functions are factory configured with an onboard current regulator for the factory lamps (or LEDs) when using a maximum DCC track voltage of up to 16Volts.
To bypass the current regulator, see related article.
3. Functions F1, F2, F3 and F4 do not have current regulators, they do switch the full track voltage from the Blue/+Common lead, so LEDs or 1.5V lamps being run on these function leads need a current setting resistor or similar.
4. For SoundBug installation, see related article.