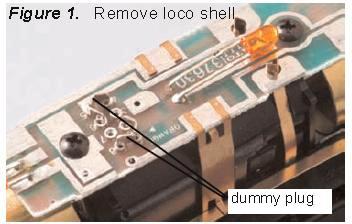
1. Carefully remove the locomotive’s shell from the frame.
Notice the orientation of the shell to the frame (Figure 1) so that you can reinstall the shell correctly.
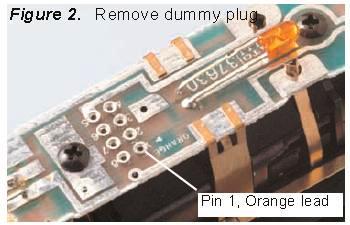
2. Remove the dummy plug from the locomotive’s DCC-ready socket. (Figure 2)
The jumper plug allows the loco to operate on a standard DC track or in analog mode on a DCC track.
Pin 1 is marked for proper orientation of the decoder.
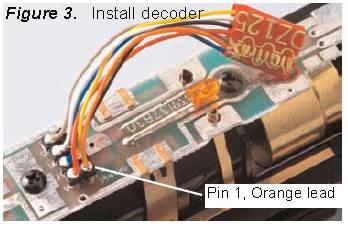
3. The DZ125PS has a short, 1" harness with a DCC 8-pin plug on the end of it.
The plug is oriented so the pin for the orange wire is inserted in the socket marked “pin 1.”
Seat the decoder firmly in the socket. (Figure 3)
4. Replace the loco shell.
You are now ready to run your locomotive.
The DZ125PS is factory programmed to address 03.
You can easily customize the address and other features.