Kato N-Scale DD51 steps needed for the DN163K1D decoder
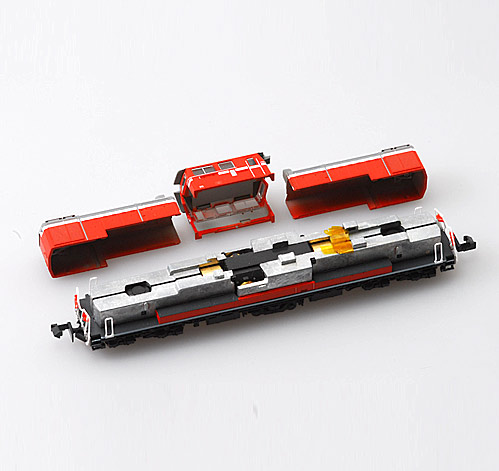
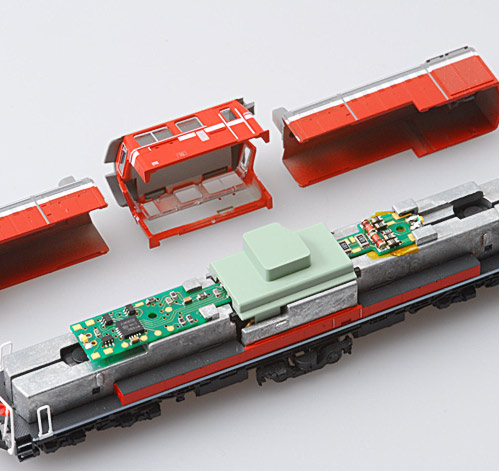
Carefully remove the DD51 locomotive shells (3) and gray plastic light board retainer from the frame.
Carefully remove the factory light board by sliding it toward the back of the locomotive and out from under the forward frame notches.
Then gently lift the board out of the frame.
Be careful not to bend or damage the motor tabs.
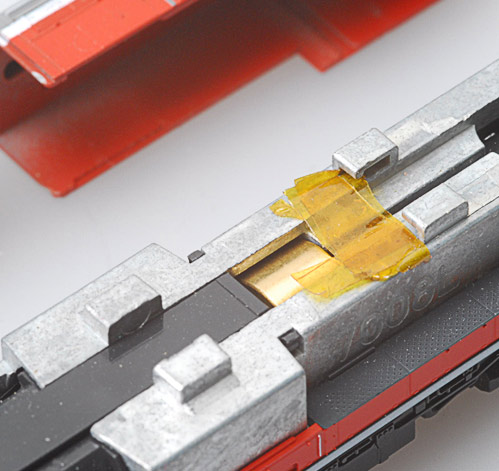
Place one or more layers of Kapton tape on the frame underneath the forward frame clip.
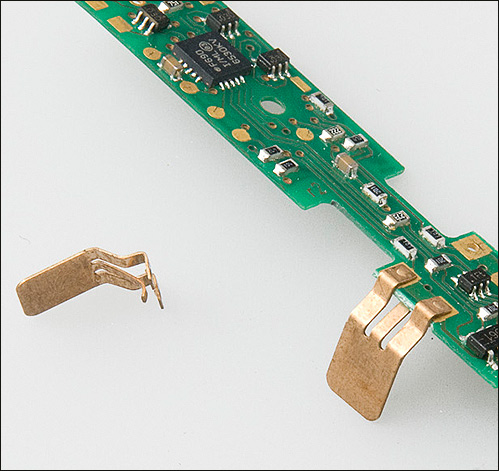
Carefully remove the motor tabs from the factory light board.
The motor tabs attach to the board with spring tension.
Reinstall these motor tabs onto the DN163K1D decoder board.
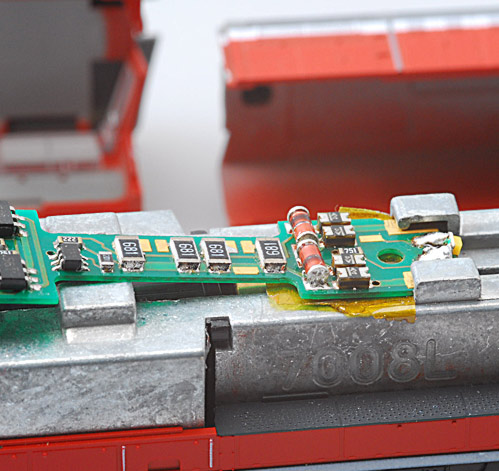
Install the DN163K1D decoder by tilting it slightly as you insert the front corners into the forward frame notches.
Slide the decoder board forward so the board's corners are under the frame clips.
Carefully maneuver the decoder motor tabs down over the motor contacts.
The motor tabs should loosely touch the motor contacts.

When done correctly, the DN163K1D decoder will reside in the DD51's frame as shown above.
Please note the decoder is firmly held in place underneath the DD51's 4 frame clips, and that the motor tabs are properly positioned.

Replace the plastic light board retainer as shown above.
The light board retainer has two plastic tabs that keep the motor tabs firmly pressed onto the motor contacts.
Replace shell and you're finished!
Please note the 2 'hood' shells go back on FIRST!
The actual cab shell is the last piece to go on.